


Learn how to easily make and fix your power cables and stingers yourself using tools that you can get at the store.
Making your own stingers and power cords may seem pretty pointless to most people who don’t like DIY projects, but if you know how to make your own cables, you can also fix your own cables. That will not only help you save some money, but if a connector gets loose, you can fix it yourself instead of sending it to someone else. It is one of the simplest things you can do and you can get all the items at any local hardware and electrical store.
Before starting any project and working with electricity or any electrical appliance, I have to tell you to make sure to follow all safety rules. Electricity is very dangerous and can kill you. If you do not feel safe please go to a professional who can help you. In video production, we are always using high powered lights that require rugged and professional stingers. Make sure you know the Wattage (Watts) your light instrument pulls and the amount of Amperage (Amps) it needs to function properly. One thing to always remember is that it doesn’t hurt to have more Amps than needed for your instrument. As they say, it’s better to be safe than sorry. You don’t want a stinger that is running from the wall, past your camera, next to your talent or subject, all the way to your light, to catch on fire and put everyone in the room in danger. That being said, I still want to show you how to make your own stingers but the burden of safety is on you.
All the items to make your own professional stingers are available at most hardware stores so there is no need to order anything online and you can shop around for the type of connectors and cord you need. Below is a short list of what you will most likely need:
1. Utility knife (Something to cut the sheath off of the cord.)
2. Wire strippers
3. Snip tool (Something to cut through the whole cord and remove damaged parts of the cord.)
4. Pliers (Not needed. I use my hands but pliers are probably safer.)
5. Screwdrivers (The type matters on the kinds of screw on your connectors.)
6. Male and Female connectors (It is up to you what kinds you use. I purchase professional looking connectors but they all work the same.)
7. Cord (This too is up to you. I used a very professional looking black sheathed cord that I bought at the hardware store.)
8. Cable ties (Keep your cables organized.)
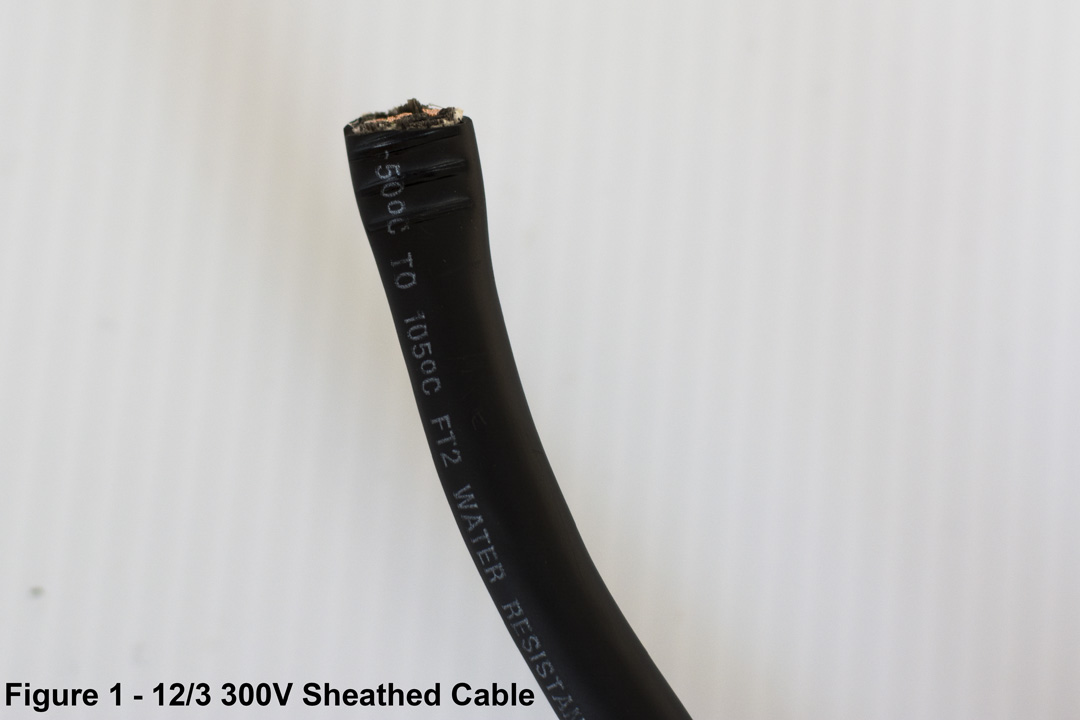
The connectors and cord are all up to you the user, but I will tell you what I bought. For my connectors, I bought a male and a female Pass & Seymor / Legrand 15-Amps 125-Volts LED light connectors. For the cord, I had the employee at the hardware store cut 25 feet of 12/3 SJE00W 300V Service Cord for me.
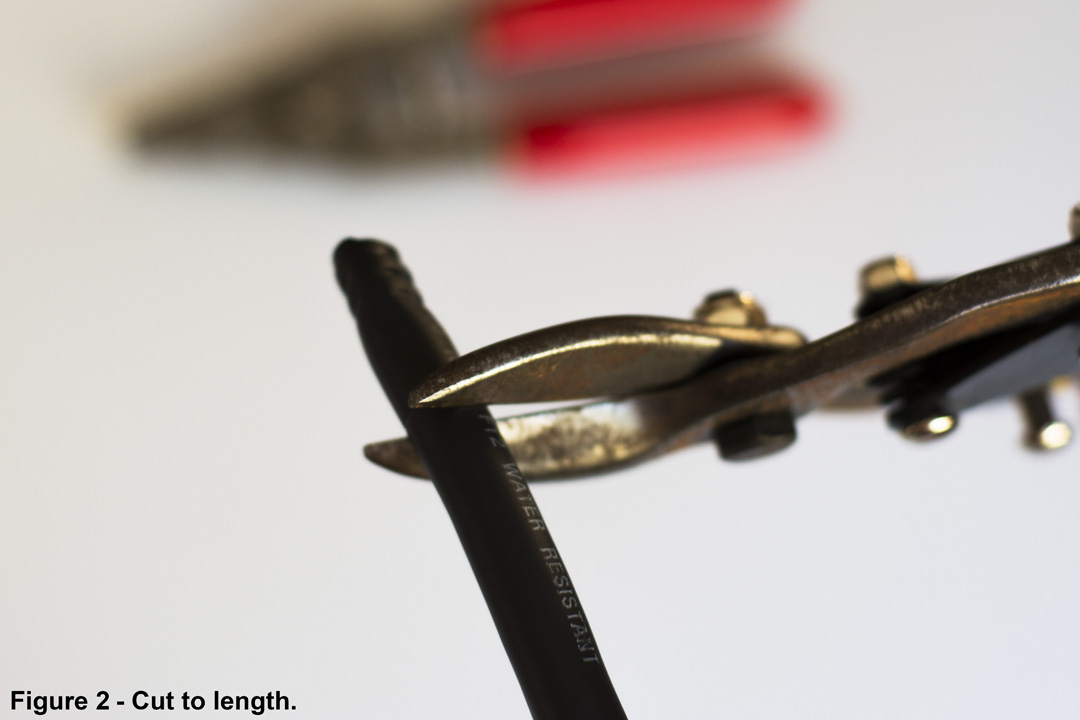
Lets get started. The first step is to cut off the ends to your cord and make sure they are even. (See Figure 1 & Figure 2)
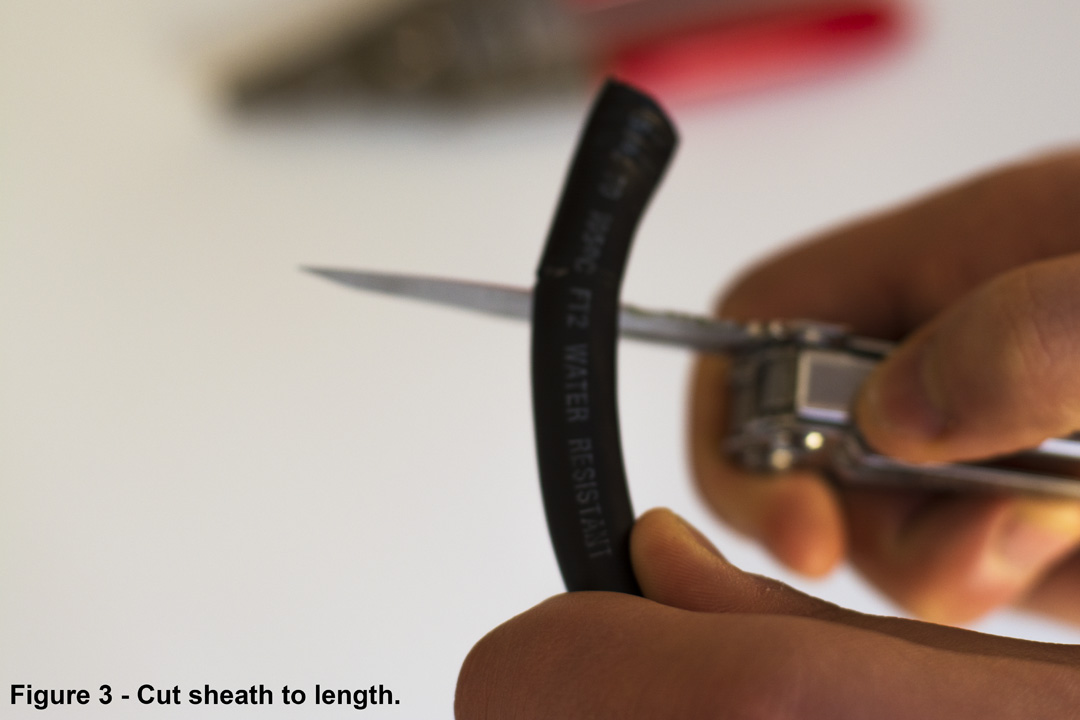
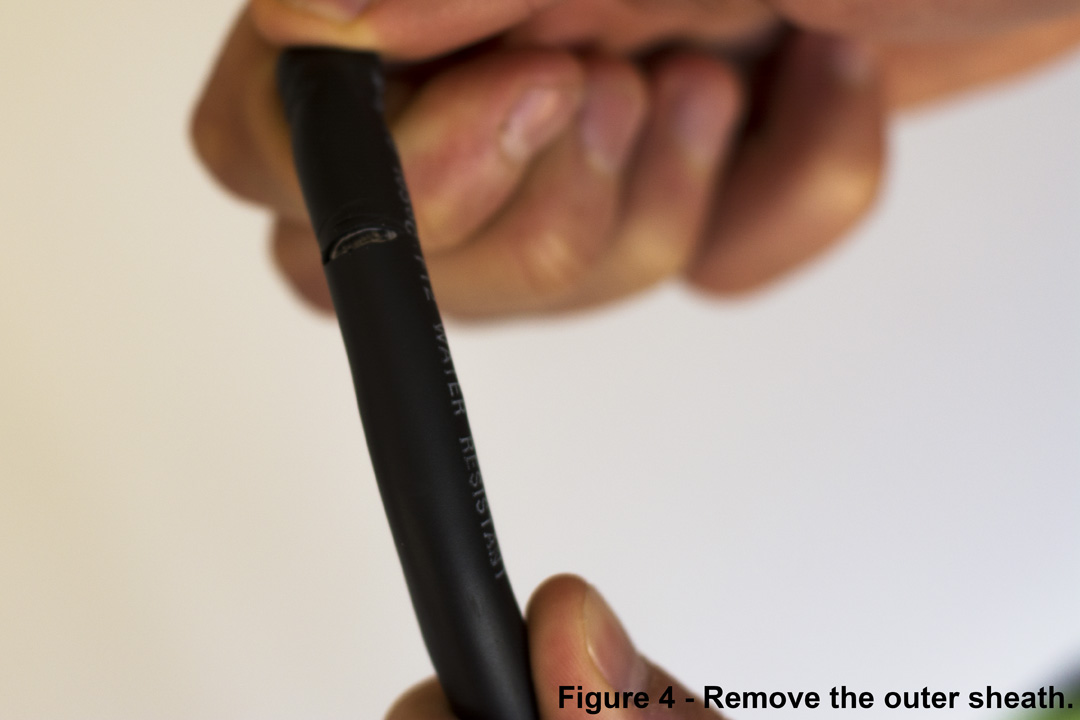
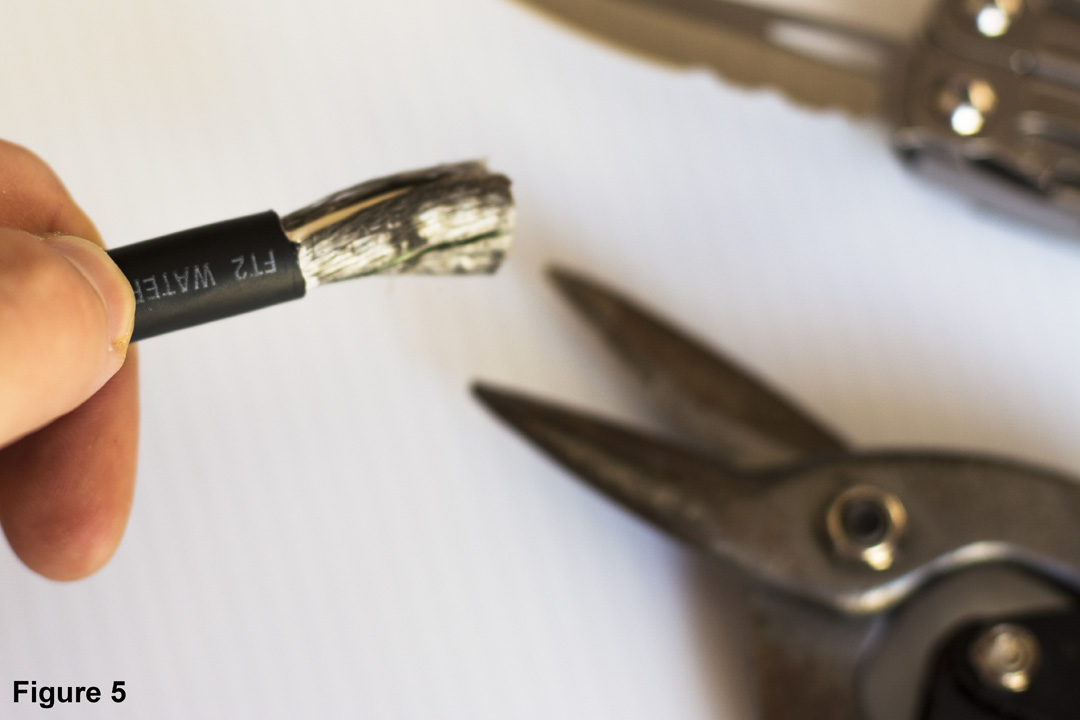
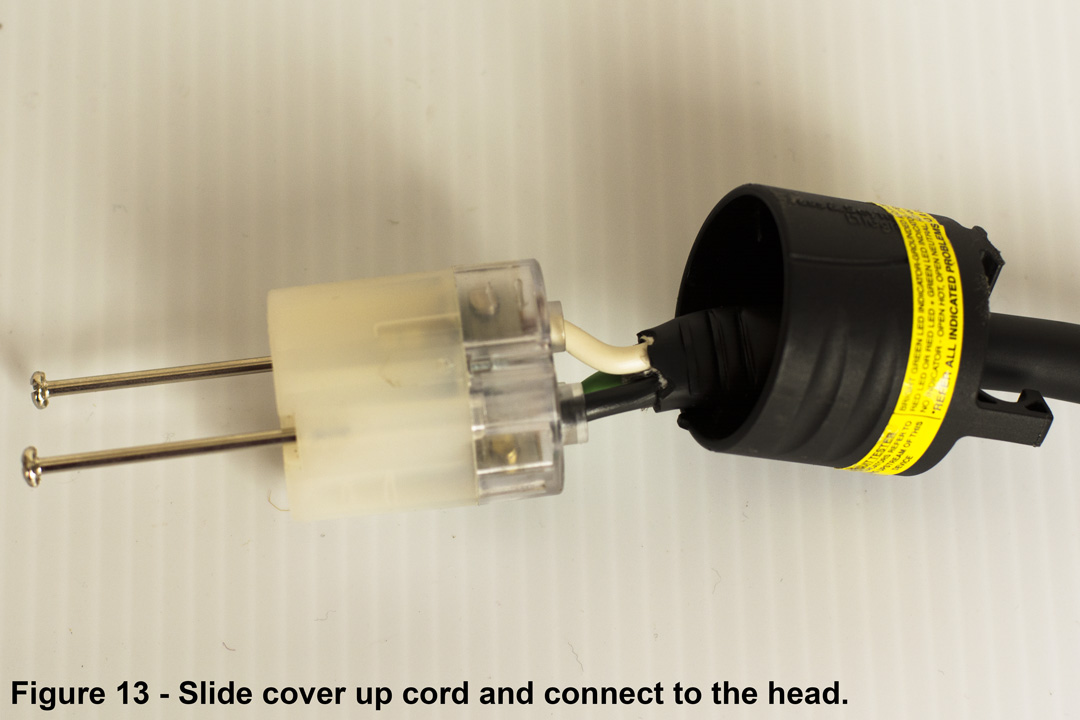
Then make sure you unscrew your connector. Most are in two parts, the head and the guard. Make sure you run your cord through the guard. (If you need a visual look at Figure 13 below) Now use your utility knife to cut the outside sheath of your cord about 1 inch. (Figure 3) Remove the outside sheath that you cut off. (Figure 4)
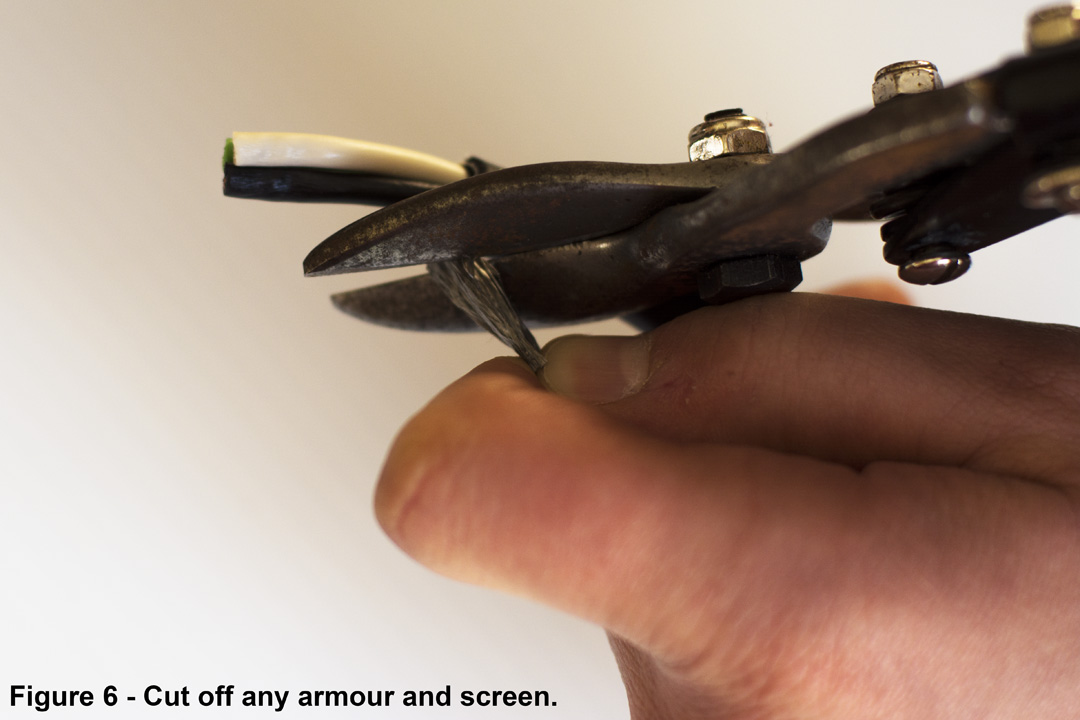
Cut off any inner protective layers inside of your cords outer sheath, so you can clearly see about 1 inch of the colored insulation that holds the copper wire. My cable has bristles inside of the outer sheath protecting the copper conductor wire. (Figure 6) Different cords have different protective layers.
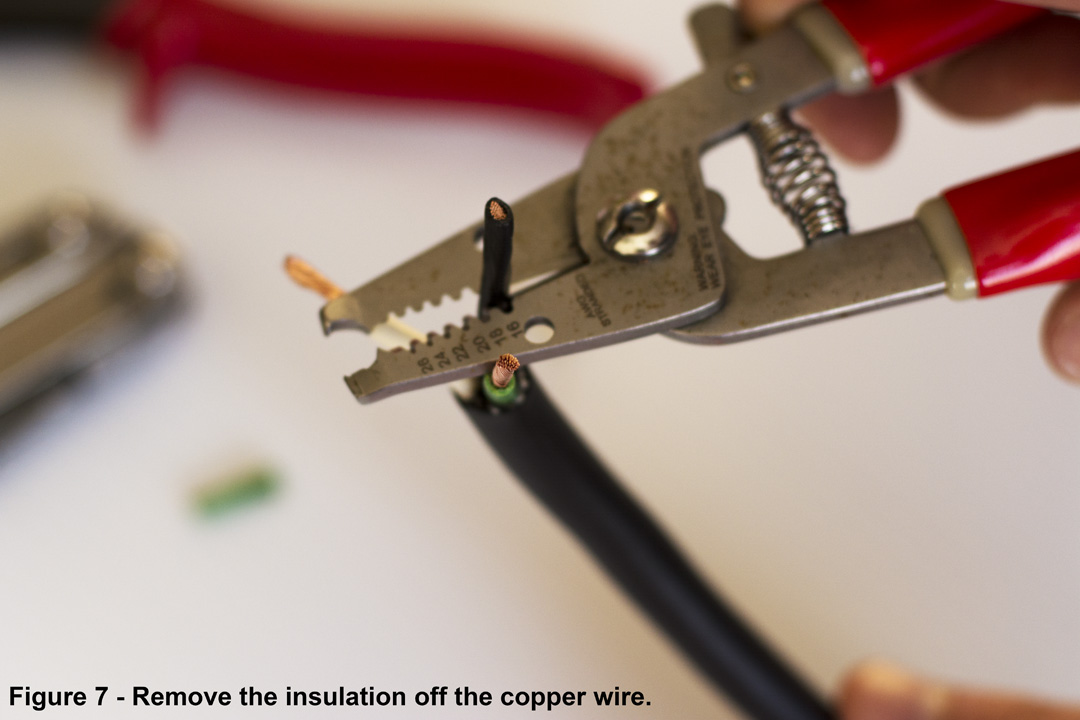
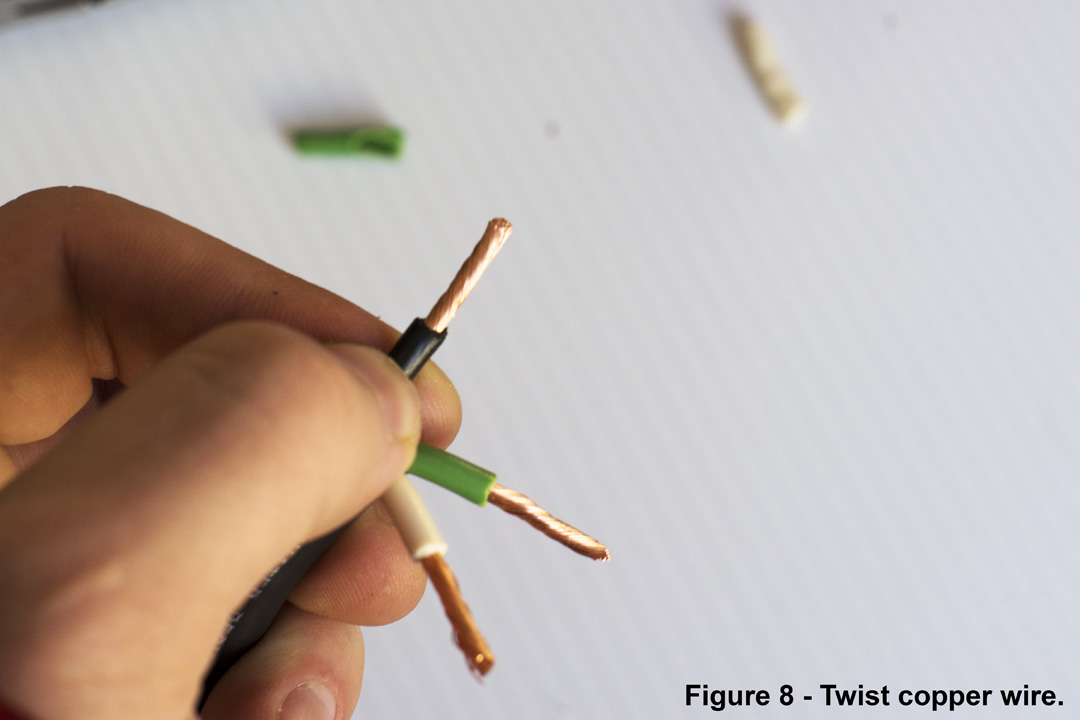
After you clean up that 1 inch of protective layering, use your wire strippers to remove ½ inch of the protective insulation (Figure 7) Be careful not to cut the inside. Then twist the wire in order to keep it together. You can use your pliers, but I prefer to use my hands because it is easier for me. (Figure 8)
Look at Figure 9 and Figure 10 to figure out how most electrical wiring is labeled and how it is used. To be perfectly honest, you can connect any wire to any connector terminal within the same cable as long as you wire it the same on the other connector. The best way to do it is to keep using the same process as all electricians wire cable because if you ever need to open the connection and fix it, you don’t want to re-connect it back wrong and not uniform with the other connector. That would cause a lot of danger to you, everyone around you, and the property.
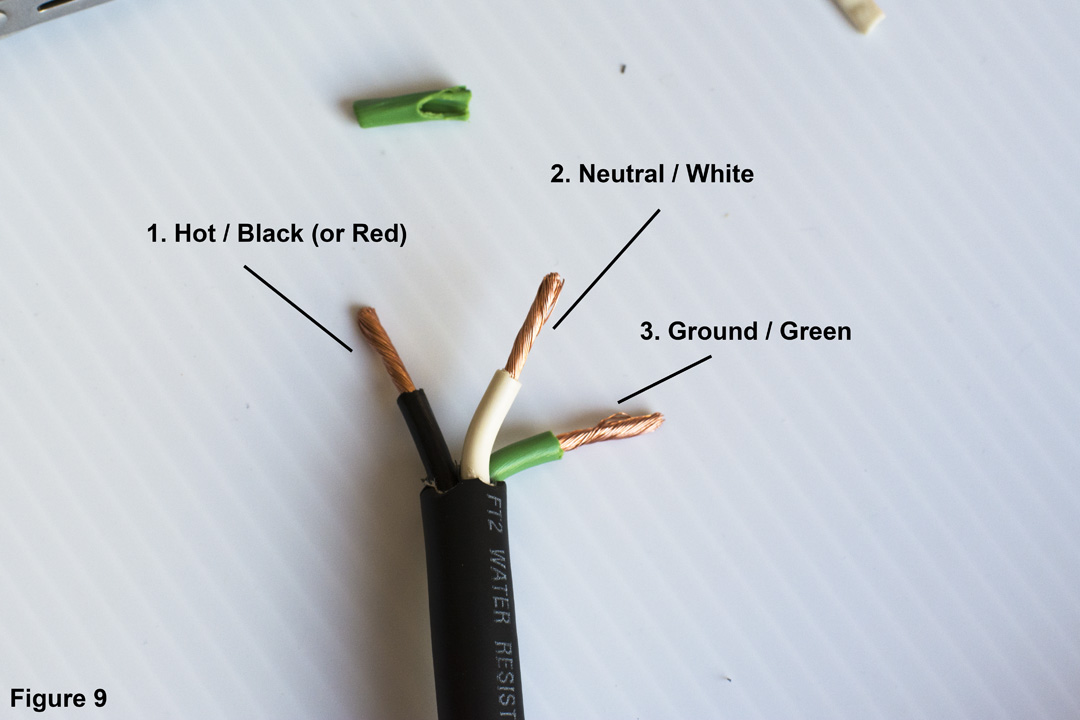
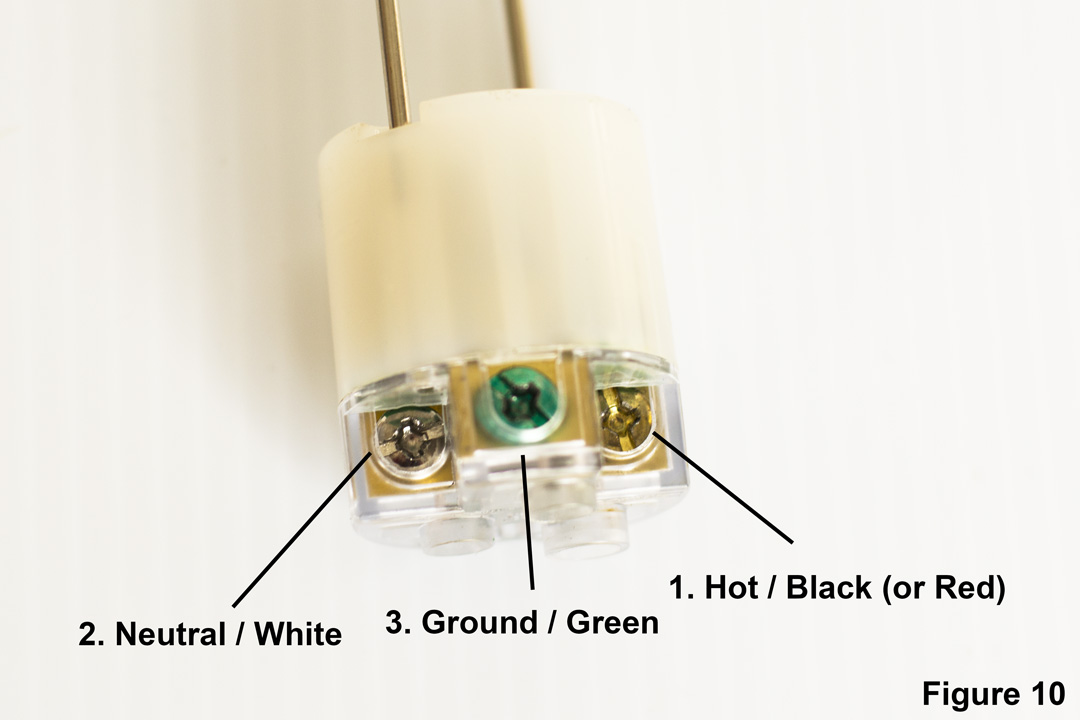
12/3 cord has three separate wires insulated through the entire cord. (12/2 cable has two) Usually, they have different colored insulation. The black (sometimes red) wire is treated as the Hot/Power line that carries the load of the power through it. The White (sometimes silver) wire is the Neutral line. The Green (sometimes yellow) wire is the Ground line, which is found on big home appliances and all professional lighting instruments to keep the electricity grounded and help prevent electrical shocks and fires. I don’t want to go into too much detail on how electrical wiring works, because that requires volumes of books to understand everything about electricity completely.
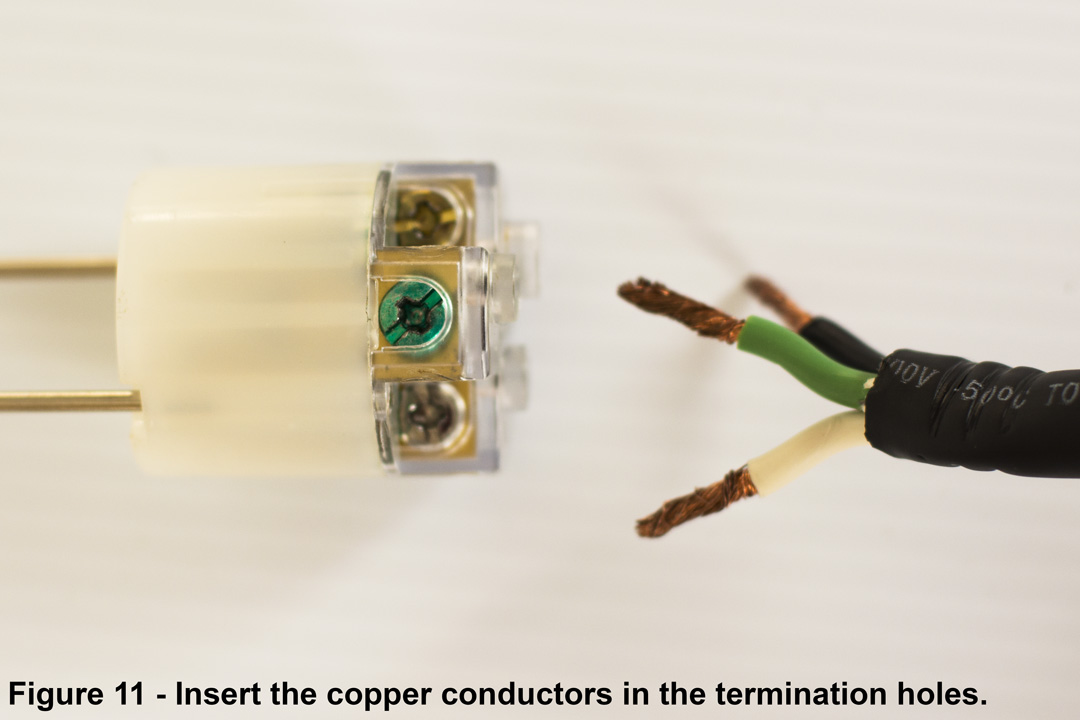
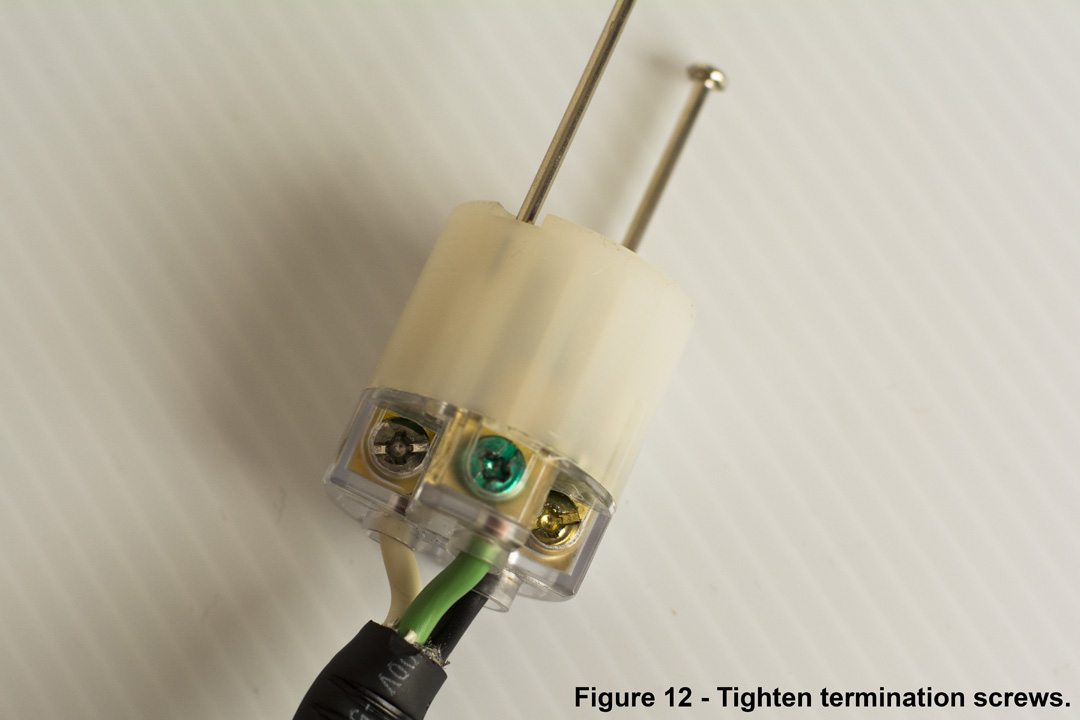
Now that you have twisted the wire to straighten it, insert the copper wire conductors to the corresponding termination holes on your connector head. (Figure 11) Then tighten the termination screws on the connector head while making sure that the termination holes are touching the conductors, not the insulation. (Figure 12)
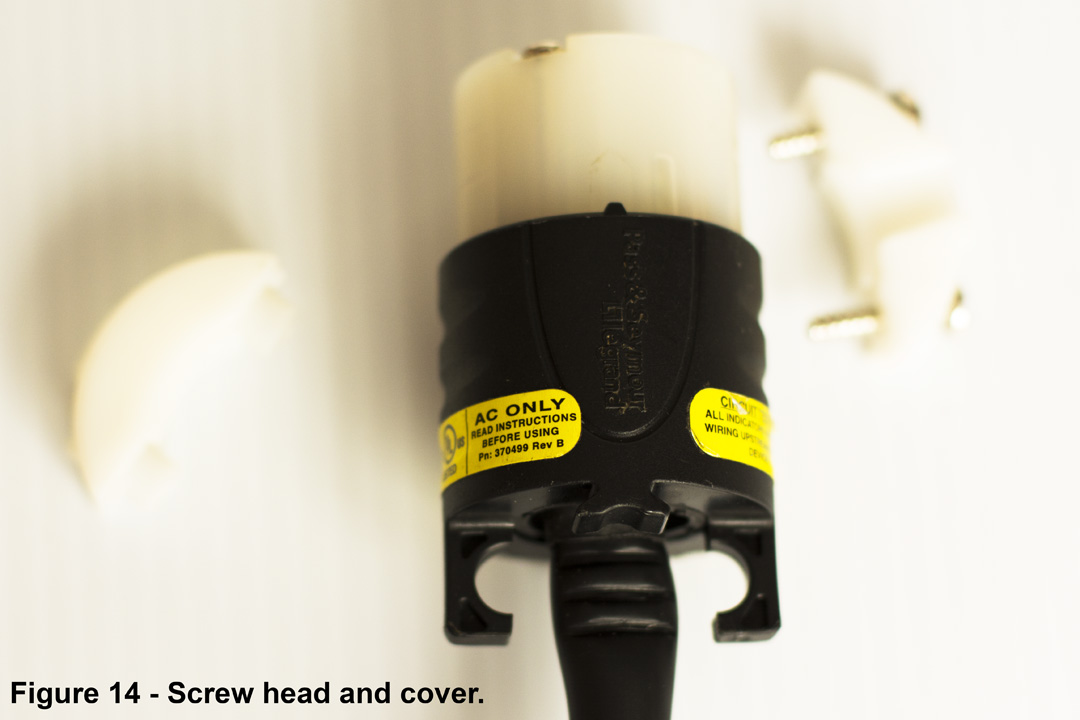
Slide the connector protective cover to the head, and screw them together. (Figure 13 & Figure 14)
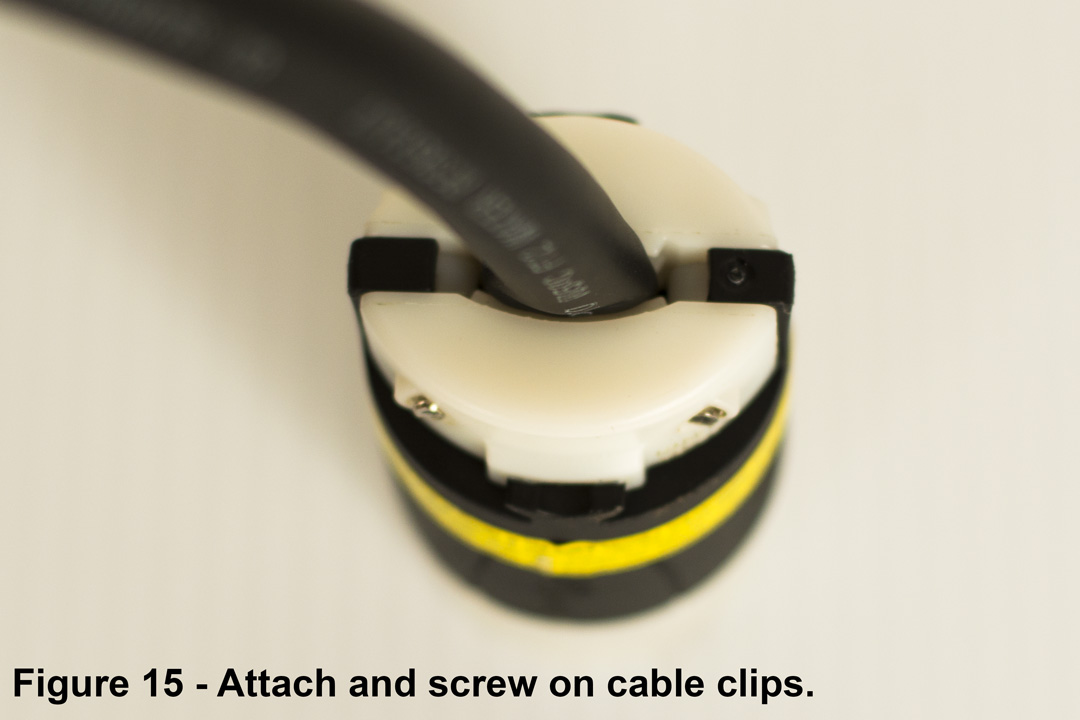
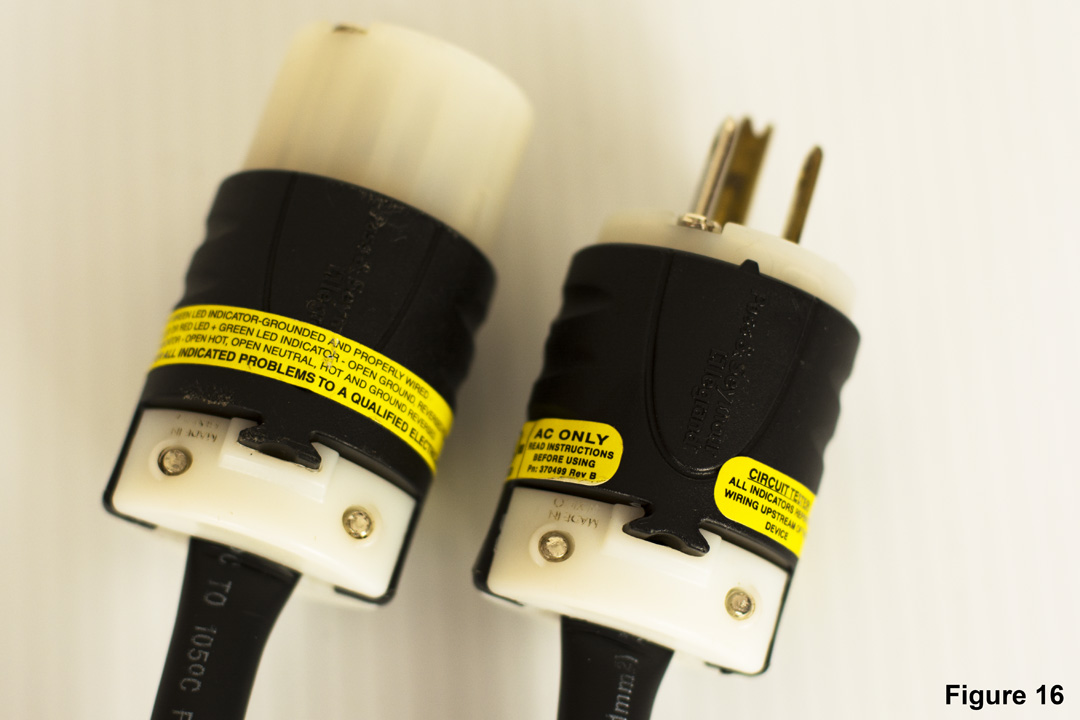
My connectors came with clips for the cable on the end. These help keep the cord from slipping out of the connector and from moisture entering. Never drop your connectors in water, and if you do, do not use them until they are properly dried. If you have clips on your connector, screw them on. (Figure 15) Go through these steps again for the other connector. (Figure 16)
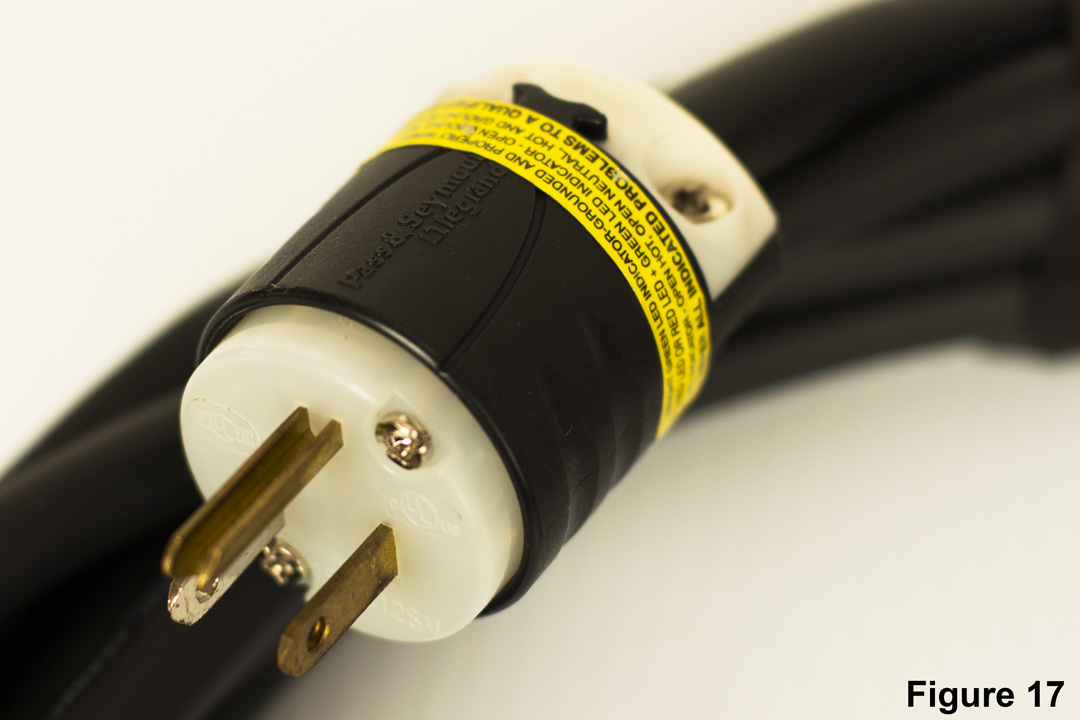
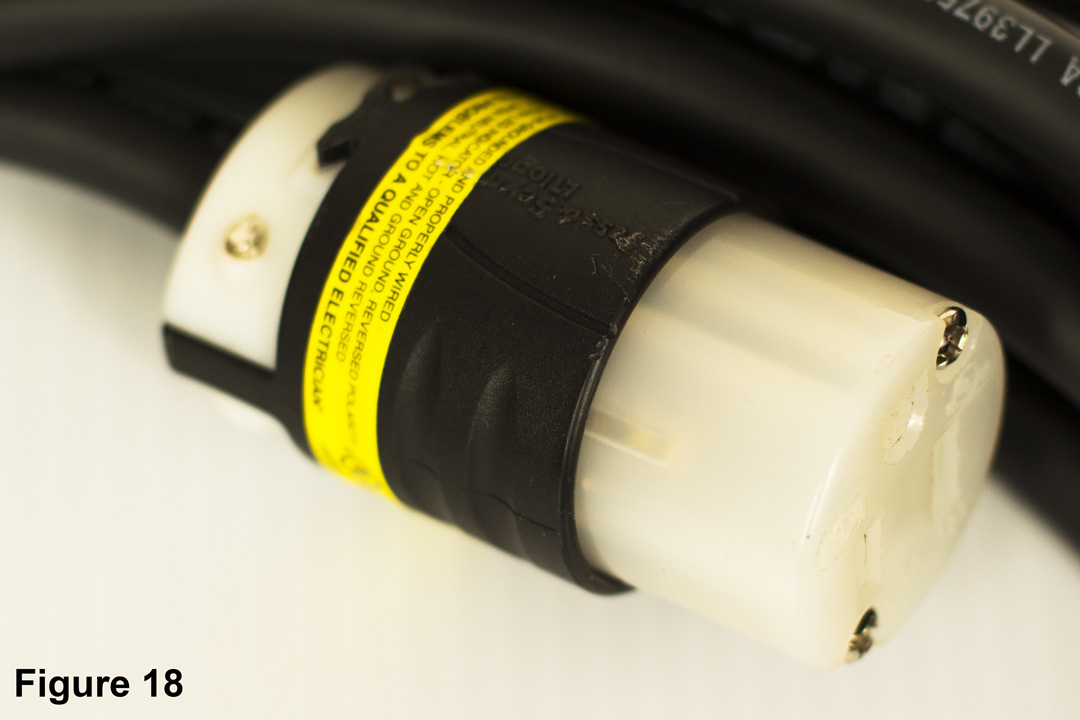
Wrap your cables and tie them with cable ties to keep them together and organized. (Figure 17 & Figure 18)
With these stingers, I do not ever use anything over 1200 Watts. The 12 gauge cord can handle way more than that. In fact, I could get away with 18 gauge cord for that wattage. The lower gauge cord, the thicker the cord and the more Amps you can run through it, and the safer the cord. With my connectors being 15 amps, I really should only use 1500 Watts or less, but I never use anything that high with these connectors.
The reason I like these connectors is because of the LED light safety indicators. The LED light tells you if the connection is working properly along the line. A green light on both connectors means it is good to go. A red light means that you shouldn’t connect your light source because there is some kind of danger. No light means that no power is coming through at all. If the male connector is green, but the female connector is either red or has no light, then there is something wrong with your stinger and you should not use it. During a production, these heads come in handy because I can test the power source at the same time I am plugging into the wall. It makes figuring out electrical issues much easier and way faster. These cost me about $50 for the connectors and the 25 ft cord. That is a little more expensive then the orange cables at the store, but way cheaper compared to stingers online. Not only are these more professional than the orange cables, but the LED light connectors are definitely worth the money.
I hope this has helped you understand electricity just a little bit better, and the process it takes to fix and make your own stingers from now on. Like I said, this is really easy. But if you have any questions, write it down in the comments below. If you have a personal project that you want us to help you with, just contact us.
It very uselful information.
so awesome thanks so much!